#51 Blogging 0 – Wedding planning 1

I’m a firm believer in if you don’t have anything to say, then don’t say anything at all, which might explain why I’ve been missing from the sewing scene of late. Sorry!

Well, that, and I’ve been planning a wedding.

This point leads me nicely onto the title and content of this particular blog.

Call me crazy, but from the moment I shared #47 Pop, I’ve been certain about of one detail about our wedding: It would involve as much sewing as my fingers and imagination would allow.

Let’s be honest, it’s the little things that make the day a truly unique and personal experience, and what would it be without a little needle and thread magic? So – I thought I’d give you all a sneak peak as to what I’ve been up to so far.

Guest table place cards:

IMG_0543

I’ve set myself the rather ambitious task of sewing everyone of our guests’ name cards that will be placed on the table for the meal.

70 names.

Yes, you read correctly, 70.

IMG_0545

Easy, right? Not really when you’re have no pattern to follow and you’re essentially making them up as you go along.

Top tips – start them early, do little and often and ENJOY IT!

I’ve had a blast choosing the different skeins to go for and had a blast researching calligraphy to turn into a pattern that fits in with the rest of my our day.

If that wasn’t enough, I’m also designing and sewing our full seating plan for the wedding breakfast and I’ll be honest, I can’t wait to start it.

The idea of having a one-of-a-kind seating plan, handmade, framed and hung on my wall for the rest of our days together is pretty special and keeps me inspired when the fingers are hurting and I can’t quite get the ‘d’ just how I want it in ‘bride’…

I guess if that’s the only hiccup I experience during the wedding planning process, I’ll be one happy briDe! (Get it?)

Watch this space…

J x

#50 Of course, it was a Christmas turtle…

Cast your mind back to post #49 and the little guessing game I set you all.

The correct answer was: A Christmas Turtle (naturally!)

image

My colleague assures me it will make sense to its recipient!

In other news…

Mr XStitch has given me an early Christmas present. He’s cleared away a book case in the spare room (craft cave!) so I can store my ever-growing collection of cross stitches, magazines and embellishments in a tidy corner.

image

And so the house domination continues…

J x

#49 All sold out, now taking (peculiar) orders!

In just three days I sold all my Christmas cards, making £100 for Cancer Research UK.

Colleagues, family and friends have all been incredibly supportive and generous in buying my cards, so much so, I think I may make it an annual event.

It seems I didn’t make enough (as Mr XStitch is taking perfect delight in telling me), as I’ve taken orders for five more of the Scotty Dogs, which I’ve spent most of my Saturday doing.

I also received an unusual request / order from a colleague.

I’ll be very impressed if you can guess what it is…

image
I’ll give you a clue, it’s not a Christmas Tree!

Have a happy weekend!

J x

#48 Stitched, sealed and (ready to be) delivered

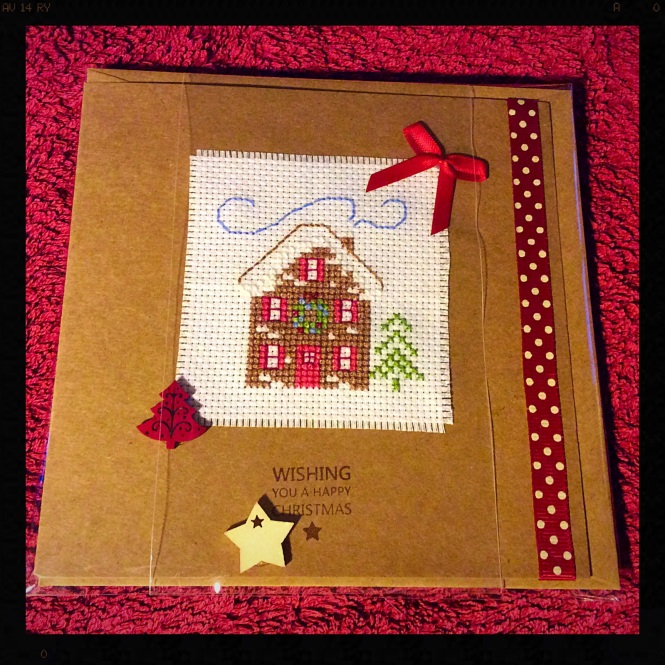
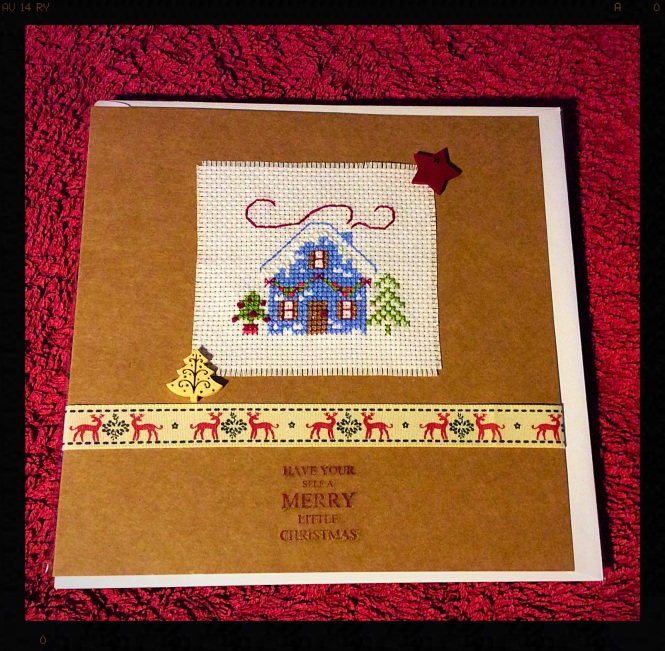
Regular readers of Life’s Complicated So Cross Stitch might remember that back in September, I posted a blog about my plan to create cross stitched Christmas cards and sell them for charity, in memory of my Mum’s good friend, Tracey, and indeed all the loved ones I’ve sadly lost over the years to Cancer.

Well, I’m pleased to say that I’ve passed my mission.

Since the middle of September I’ve made and packaged 30 truly unique cards to be sold over the coming weeks.

From Rudolf and Santa hat wearing scotty dogs, to snow-scapes and fairies, I’ve collated my favourite Christmas designs either bought or free in magazines, and made up this selection of festive fancies.

Pick a favourite, you ask? I couldn’t possibly! Twist my arm, and it might just have to be the snow covered house designs…

Snow on the rooftops

image

Behind the scenes:

To create 30 Christmas cards might not, at first, sound like that arduous a task – I too, thought it sounded easier in principle than it turned out to be in practice.

There were often times when I didn’t feel like cross stitching, a feeling I’m sure we’ve all come across over our crafting years, and other times I didn’t want to get out all my ribbons and embellishments to make up the cards.

To counter this, I found it easier and more fun to work in stages; a one-woman production line if you will.

I would usually make up around 7-10 completed cross stitches over the course of a week or two and then have a little card making session.

Not only did this help to keep the experience fun and varied, but it meant that I was able to keep my inspiration, ensuring they were all different.

Another tip is to have fun when collecting your different bits and bobs.

I went to a stitching and sewing exhibition to pick up all my ribbons and took a trip to Hobby Craft for my wooden embellishments. I kept the colours suitably simple and seasonal to make sure all tied into the same sort of theme, but different enough so the cards all had their own signature style.

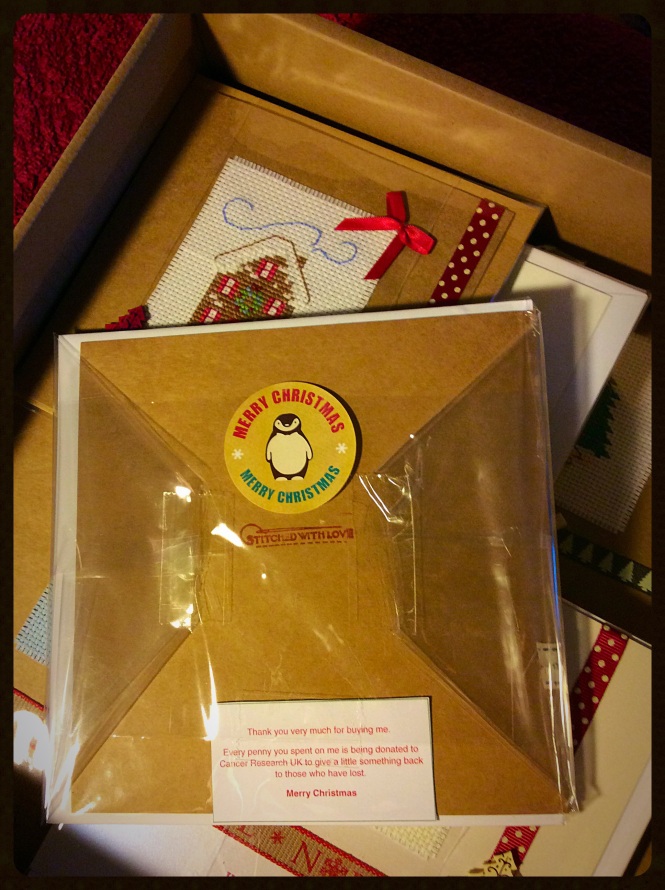
I picked up a ‘stitched with love’ stamp for the back of the card to give it the personal touch, and finished off the packaging buy using clear cellophane for a professional finish, and included a little slip saying:

Thank you for buying me.

Every penny spent on me is being donated to Cancer Research UK, to give a little something back to those who have lost.

Merry Christmas.”

I popped a Christmas sticker on the back of the packaging and there you have it.

image

I’m looking forward to seeing what family and friends make of the cards and, if all goes well, may make the project an annual occurrence.

A good deed well done.

J x

#46 One cross stitcher’s gift to herself

As any cross stitcher, or indeed, crafter, will tell you, we rarely complete projects for ourselves.

Whether it’s quilting or card making, cross stitching or knitting, our projects usually find their forever homes in those of others.

So when you finally do make something for yourself, it can be an alien sensation.

Like yesterday.

Mr XStitch very kindly offered to have one of my first and favourite cross stitches framed for my birthday, to be displayed in our house.

image

It’s our Bengal Bundle of Fluff.

And it looks lovely, even if I do say so myself.image

I don’t think I’ll be hanging up my gift-giving hat any time in the near future, but I’m so pleased that I’ve finally got one of my pieces professionally framed and finished, especially when it means as much to me as it does.

Tell me…what projects have you finished for yourself?

Comments below, please!

J x

#44 All aboard

I’ve never been one for the parking technique.

The idea of having lots of different threads and cottons lying loose at the front of my aida, while convenient, to me, isn’t very practical. Perhaps it’s my OCD tendencies that require me to have complete order with my sewing, or maybe it’s just the fact I came across the idea too late to get my head around it!

I have, however, over the recent months been contemplating how I seem to be quite a slow stitcher and, when you’re on a tight deadline, this is far from ideal.

I’m not sure if anybody else uses more of a ‘blocking’ technique, but I’ve come to use this of late and it seems to be making me stitch faster and neater than I think I’ve ever done before.

It’s simple:

Choose a colour close to the central point that seems to cover a large surface area of the pattern and work out in sections.

Keep doing so, working out towards the edges of the pattern, selecting colours and shapes that will help you to pick out the design of the piece, while ticking off a decent number of stitches.

When you can make out the pattern and you have done as much outlining and blocking, as I like to call it, then start to work back in towards the centre to fill in the shading.

The only thing I will say about this technique is that you MUST be careful with your counting. One mistake on the inside of your pattern could dictate the rest of the design, which means either a lot of reworking or a lot of unpicking, depending how strict a stitcher you are on yourself.

image

I started this Christmas train tree decoration last night and have perhaps spent about 2-3hours on it thus far. It’s on a plastic piece of aida, which I’m using for the very first time, too, but still the results seem to be heading in the right direction.

I’m not saying I’ll be setting any world records for the fastest stitcher any time soon, but the more cards I can make this Christmas, the bigger contribution I can make to charity.

J x

#43 Christmas came early for this cross stitcher…

Earlier in the year, Mr XStitch and I went along to the Sewing, Stitching and Hobbycrafts Event (#28) and came away with some absolute treasures (well I did, he came back tired and with a new found respect for online shopping!)

This weekend it was back with bells on, as exhibitors and crafters alike knew it was all about one thing: Christmas.

Ribbons, buttons, patterns, skeins, die-cuts, card, inks, glitter glue, decoupage all with your favourite Christmas characters.

I was there to pick up some beauties from my favourite craft barn, Black Sheep Wools, and to see if I could fill my crafting Christmas stocking a little early. I did.

The loot:

image

My favourite buy of the day has to go to this modest little stamp:

image

What better way to finish off the Christmas cards I have planned than with this heartfelt and genuine statement?

It’s also been a weekend of finishes, including this piece from the latest issue of The World of Cross Stitching magazine.

image

image

I’ve found it to be a great way of using up my own skeins and, with a little help from the BBF (Bengal Bundle of Fluff) we managed to make it our own adaptation by going with a more simple version. Still very effective though, I hope you’ll agree.

image

You’ll note I’ve frayed the edges of the aida… More on this later.

J x

#42 Now bring us some figgy pudding…

Much like last years’ attempt, (#11) I’ve been working on adapting existing cross stitch patterns to put my own spin on my Christmas cards.

This year I’ve picked up a selection of magazines, including Christmas Collections – which I’d highly recommend, and started selecting patterns that I hope will work well as cards, be reasonably quick to finish and enjoyable to stitch.

As I hope you’ll be able to tell, this is a festive figgy pudding with all the trimmings.

image

I’m really pleased with how this little fellow has turned out. It’ll go great with some Christmas ribbon I picked up recently, and a couple of snow flake embellishments for added effect.

image

Thanks to all who have liked and / or commented on my recent Christmas posts – it’s lovely to have a little place on the world wide web to share your hobby and passions and get such positive responses in return.

You’re all lovely.

J x